

Coloring with a Gradient Mesh in CorelDRAW
(available in video format here)
For this this lesson we’re going to use a previous illustration created in the tutorial called Creating a Vector Travel Mug in CorelDRAW.
Using the Mesh Fill tool we’ll create a realistic looking silver bottom on this coffee mug.
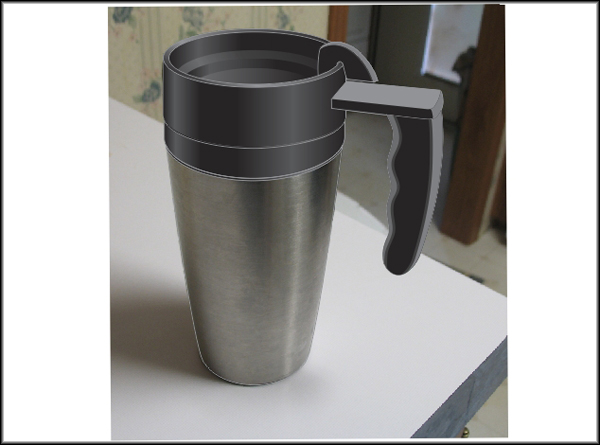
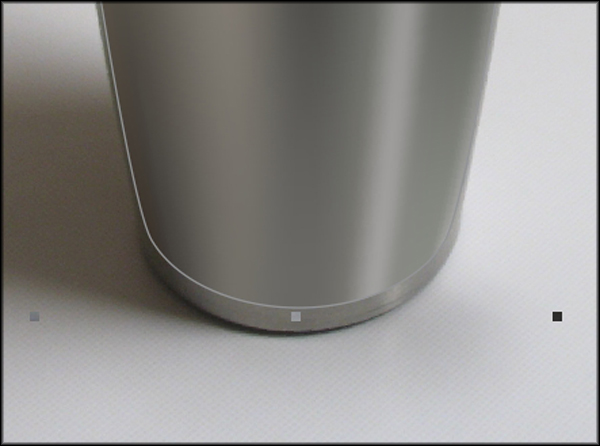
In the previous tutorial we had just finished creating the mug and colored the bottom section using a gradient. It looks good as it is, but if you want a more realistic look the Mesh Fill tool does a does a much better job.
Keep in mind that some Microstock sites such as iStockphoto want you to indicate in the description of your vector art that you have used a Gradient Mesh so that the customer is aware of it.
Using our previous art, make the fill for the bottom part none. Keep the outline. Place and line up the original image of the mug behind the art.
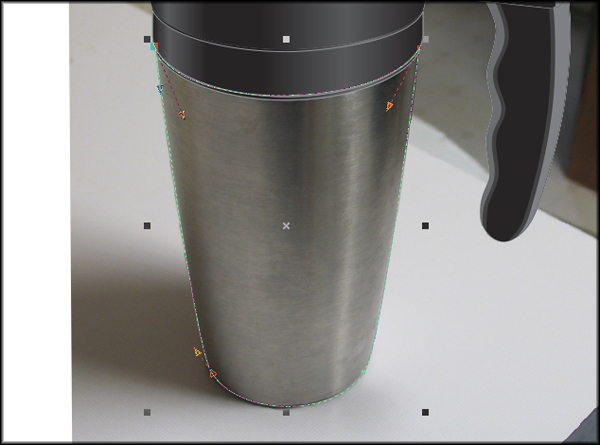
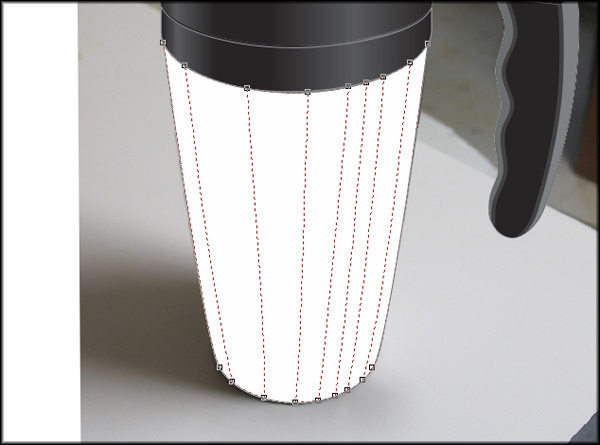
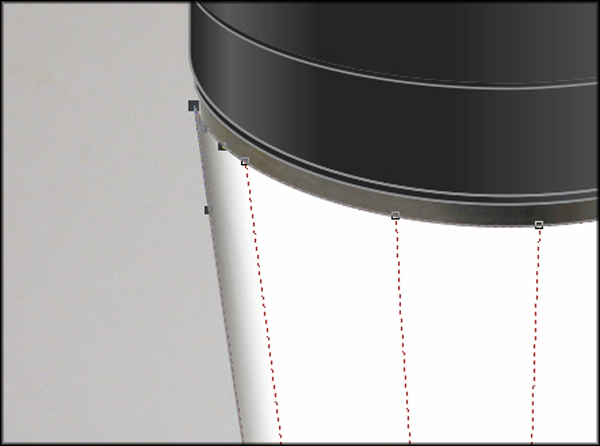
In order for this tool to work correctly the object representing the bottom of the mug needs to be simplified as much as possible. I have gone through and eliminated all except four points which define the entire object.
Click on the Mesh Fill tool.

Click on the object. It automatically creates a mesh with a point in the center.
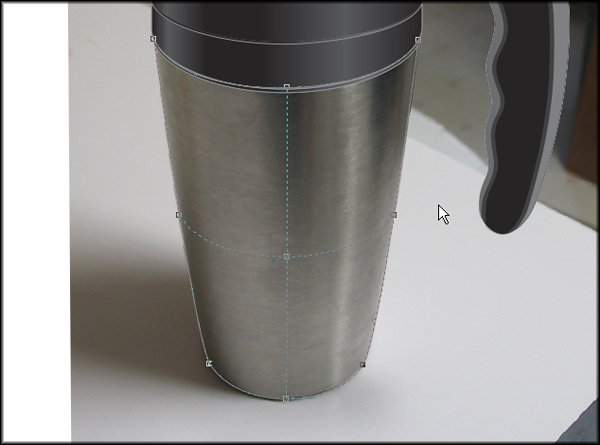
Select the center point and delete it. Double-click along the top of the shape placing points defining your mesh grid. Make it look something like this. If your lines are wavy or look distorted you may have to adjust the edges more. You can also adjust each line using the Shape Tool.
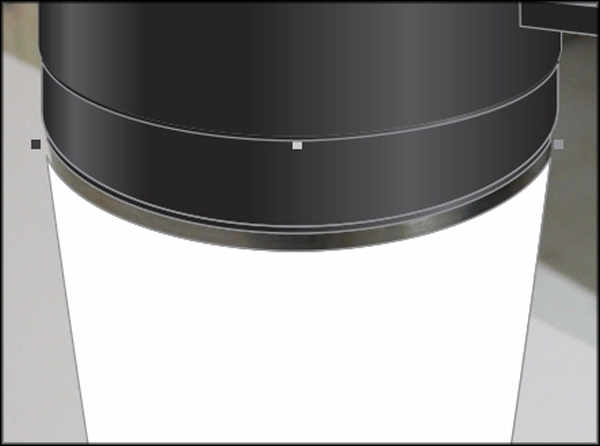
Move the object down sightly so that you can see the top edge of the silver bottom of the mug.
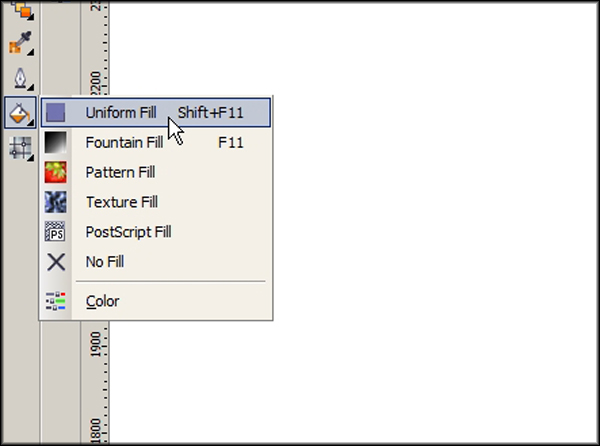
Select the farthest point on the left at the top of the object. Open the Uniform Fill palette.
Click on the eyedropper.
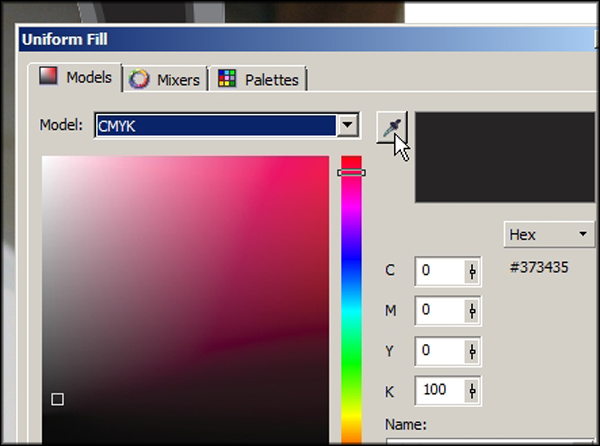
Now click on the image just above were the point is to select a color, then click OK. This fills the area with the chosen color.
Repeat this process of selecting the point, opening the Uniform Fill palette and selecting a color with the eydropper next to the point until the entire top row of points have assigned colors.
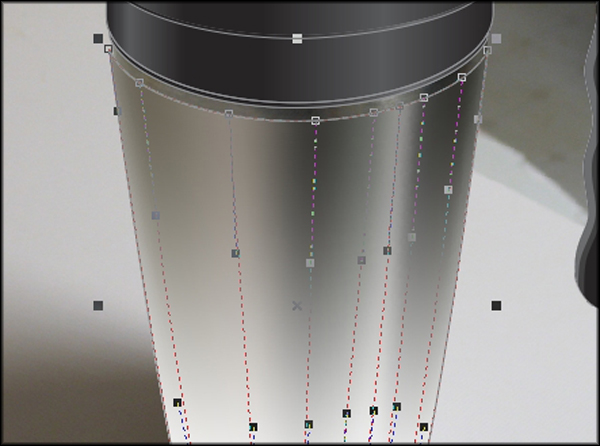
Select and move the object up until you can see the silver bottom in the photo of the mug.
Repeat the process used to color the top of the mesh to finish coloring the bottom. Once you have colored all of your points along the top and bottom you can look the whole thing over and make any corrections you may want to make to the colors of the points. I have lightened some of the points slightly. The mesh can be as closely colored to the original image as you want it to be. Once your happy with how it looks you can delete the background and you’ve completed you’re vector gradient mesh.

Now I suggest moving on to the tutorial called Creating an Illustration From Hand Drawn Art in CorelDRAW.