

Creating a Simple Logo Using the CorelDRAW Bezier Tool
(available in video format here)
First we need an image to work with. This can be anything, but for our purposes we’re going to use an actual logo. The client wants to put their logo on a coffee mug. The vendor that prints the mugs requires vector art but the image of their logo that was sent to us is a low resolution jpeg and useless for this application. Our goal is to recreate this logo in vector format that can be easily used for any purpose.
In CorelDRAW open a new document..
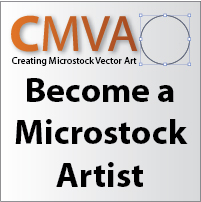
This is the Image we are using. You can right click on the image below and then choose Save Image As, save it to somewhere on your computer. A good place might be in your My Pictures folder or perhaps on your desktop.
Back in CorelDRAW go up to File in the top menu and click on import.
This opens up a browse window where you can browse for your image. Select the image from where you saved it and click import.
Using the pick tool size and position the image how you want it in the document.
Let’s lighten the image a little so we can see our vector lines more easily. Select the image. Go to Effects in the top menu, click on Adjust and choose Hue/Saturation/Lightness.
Make sure you have the image selected using the Pick Tool. Use the slider to turn the lightness up to 50, or you can just type in 50. Click Ok.
This will enable us to see the lines we are creating more easily. You can see the image is now lighter.
Another way to help in seeing your lines is to change the size and color of the outlines. Make sure nothing is selected. Choose Outline Pen from the tools on the left.
Go down to 1.5 pt and select it. This gives you a 1.5 point outline.
By default there should be a color palette on the right side of your workspace. If not go to Window in the top menu, click on Color Palettes and then choose CMYK Palette.
Click on your Bezier Tool
With the Bezier Tool Selected go over to your palette and left click on the box with the X at the top.
When the box pops up click OK.
This left click on the color palette chooses what fill color we want and since we don’t want a fill color we are choosing no fill represented by the X.
We do want an outline color, so right click on the bright blue cyan color. Again click OK when the box pops up.
Now we’re ready to start recreating the logo in vectors. There is more than one way to recreate this logo but for this lesson we are going to mostly use just the Bezier Tool along with a few shortcuts. Go to your Bezier Tool. Start at the top left corner of the A. Place nodes around the edge of the entire A.
Use the Zoom Tool as needed. To use this click on the Zoom Tool.
Your cursor turns into a magnifying glass icon with a plus sign inside. Left click to zoom in, Right click to zoom out. You can also use the wheel on your mouse to zoom in and out.
Once you have the image how you want it go back to the Pen Tool and create the triangle inside the A.
At this point let’s zoom in on what we have created so far, using the Shape Tool edit the lines of the triangle and lower part of the A so that they are in line with each other. Also make sure the bottom of the A is even all the way across.
One way to do this is to use a guideline. You will need to have Rulers showing in Illustrator. You may already have rulers showing on the top and left side of the program.
If not go to View in the top menu and go down to Rulers and click on it. Now place your cursor over the top ruler and click, hold and drag down a guideline and place it at the bottom edge of the A. Now you can line up the bottom of the A using the guideline. Just select it and hit delete when your done with it.
We are going to use a shortcut to create the upside down A. Use the Pick Tool to select the outside of the A, hold down the shift key and click on the inside of the A. This will select both objects. Hold down the control key and hit the C key to copy, hold down the control key and then the hit the V key to paste a copy of the two objects on top of the original. With the objects still selected go to the top of the selection and when the cursor turns to the up and down arrow icon click and drag the top down and line it up with the upside down A.
Now let’s create the black shape around the upside down A. Using the Bezier Tool place a line around the shape using only four points. Line up the top of the shape with the guideline. I’ve changed the color of the outline to a red so that you can see this better.
So far we’ve only had to use straight lines but for the top shape we will have to use curved lines. We’re going to make this in two parts. Start by making a shape around the entire black area. Click the left bottom point first, then at the top center, click... then hold down the Ctrl key and drag the control handle of the curve to the right. Drag the curve straight out horizontally until it fits the shape in the logo.
Next click the right bottom point of the shape to complete the top of the shape, then at the bottom center click and drag to the left while holding down the Ctrl key. Drag the curve straight out horizontally until it fits the curve in the logo. Finally click on your first point at the bottom left to close the shape.
Repeat the steps you just used and create the white shape that is inside the black shape.
All of our shapes are now created. All we have to do is color our shapes appropriately.
Start by selecting all of the shapes that will be black. except the triangle in the upside down A. Make the Fill black and the Outline none.
As you can see some of our shapes seem to have disappeared. They are still there, but because of the order in which the shapes were created, some of the objects are hidden behind others. We need to move all of the black objects so they are behind everything that will be white.
With all of the black objects selected except the black triangle on the upside down A, hold down the Shift key and hit the Page Down button on your keyboard. This sends all of those objects to the very bottom or behind everything else.
Now hold down the Ctrl key and hit page up one time. This moves the objects up (one object at a time and will make it so that they sit above the image but below everything else.
Now we can see all of the objects again.
Select all of the objects that are to be white. Using the color palette make the Fill white and the Outline none. Select the triangle in the upside down A and change its color to Fill black and Outline none. Select the imported image of the logo and hit delete on your keyboard. Now is the time to do any tweaking to get the logo exactly how you want it. Once that is done you are finished Congratulations, you now have created a vector logo suitable for use in any printing situation.
Next I suggest moving on to Creating a Simple Vector Logo Using the CorelDRAW Shaping Tools. You’ll learn to create the same logo using the Bezier Tool along with other tools and techniques that can help you to illustrate faster and more efficiently.