

Creating a Simple Logo Using the Illustrator Pathfinder Tools
(available in video format here)
This tutorial is a companion lesson that goes along with Creating a Simple Logo Using the Illustrator Pen Tool. In this lesson you’ll learn to create a simple logo using not only the Pen Tool, but also the Pathfinder tools along with other tools and techniques that can help you to illustrate faster and more efficiently. You’ll learn a few shortcuts and tips that can make you a better illustrator.
In Illustrator open a new document.
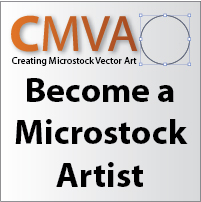
This is the Image we are using. You can right click on the image below and then choose Save Image As, save it to your computer. A good place might be in your My Pictures folder or on your desktop.
Back in Illustrator go up to File in the top menu and click on Place. This opens up a browse window where you can browse for your image. Select the image from where you saved it and click Place.
Position the image where you want it on the artboard.
For purposes of this tutorial we will use the Essentials workspace. Go to Window in the top menu, click on Workspace and choose Essentials. The panels should appear on your workspace on the right.
These are the basic tools we might need and even though we won’t be using most of them it is a good habit to use a workspace where the tools are out of the way. Later on as you develope your skills you’ll probably customize that area in your own way.
Let’s lighten the image a little so we can see our vector lines more easily. Go to the panels on the right and choose Transparency. This expands the Transparency panel.
Make sure you have the image selected using the selection tool. in the Transparency panel change the Opacity from 100% to 40%.
This will enable us to see the lines we are creating more easily. Once you have done this you can close the Transparency panel by clicking its icon again. You can see the image is now lighter.
Another way to help in seeing your lines is to change the color of the outlines. Select your pen tool first. Go to the panels on the right again and select Color. This opens the color panel. First let’s get rid of any fill color which we don’t need for now. Click on Fill and below that click on None.
Next click on Stroke and in the colors section choose something that will be easy to see against the background image. I’m going to select a bright blue color.
Now we’re ready to start recreating the logo in vectors. Let’s start with the letter A. You could create this using the pen tool as we did in the previous lesson. Another way is to use the actual font or typeface that was originally used to create this. With experience you’ll learn to recognize fonts more easily, for now I’ll find it for you. It looks like the font has been stretched and altered from it’s original appearance which makes it more difficult to find. After scanning my fonts the closest one I have is called Zurich Xblk BT. This font can be found for free through Google.
This is what it looks like without being altered.
This is what it looks like after being stretched wider.
Now Copy (Ctrl+C) and Paste in Front (Ctrl+F) the A. With the copied letter still selected grab the top of it and pull it all the way down until it lines up with the bottom of the upside down A. Move the top and bottom until it matches the upside down A.
Go to the Rectangle Tool.
Create a rectangle that looks like this. Looking at the shape in the logo it should be halfway between the wide top and the narrower bottom of the rectangular shape around the upside down A.
With this object selected go to Object in the top menu, choose Envelope Distort and click on Make With Warp.
This opens a Warp Options panel. Click on the preview box so you can see the effects on your art. Use these setting to change the shape of the rectangle.
You can see how your object has warped into a different shape. Play around with the shape of your object and the settings in the Warp Options palette until your shape matches the one in the image.
Once you have it shaped go to Object in the top menu and click on Expand. In the box that opens uncheck Fill and leave Object checked. Click OK.
It’s a good time to make sure the pieces you have created so far line up with each other.
Select the Ellipse Tool.
Hold down the shift key, click an drag to create a circle. Use the Selection Tool to move and re-size the circle to fit this portion at the top of the logo.
Copy and Paste in Front another circle and move it down using the arrow keys until it lines up like so.
Pull the bottom up a little.
Widen both sides slightly.
Go to Window in the top menu and select Pathfinder to open the Pathfinder panel.
Select both ellipses and on the Pathfinder panel click on Minus Front.
The top object trims out of the bottom object. You should end up with something that looks like this.
Select the new object, Copy and Paste in Front. Move the object down to here.
Paste another copy and move it to here.
Move the bottom up slightly.
Select both objects and on the Pathfinder panel click on minus front. Go to object in the top menu and choose ungroup and delete the unwanted objects at the bottom.
All of our shapes are now created. All we have to do is color our shapes appropriately.
Start by selecting all of the shapes that will be white, the upside down A and the small crescent. Make the Fill white and the Stroke none.
Go to Object in the top menu and click on Bring to Front.
Select all of the object you want to be black. Make the fill black and the stroke none. Select the background image and hit delete. Your vector logo is now complete.
Next I suggest moving on to something a little more complicated such as Creating a Vector Four Leaf Clover in Illustrator.